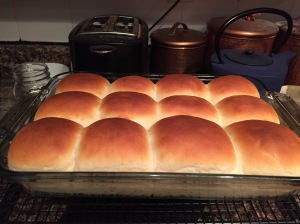
I am going to start this post with an entirely banal statement. Homemade bread is amazing. I know I’m not staking out a highly contentious position with this, but I feel like I need to make my position on this topic clear from the beginning. Unfortunately, good yeast breads tend to take longer than I want to devote to cooking on a week night, so I’ve been relying on the take and bake loaves of bread from the local Kroger. These are all well and good for the crusty bread fix, but there’s nothing quite like a fresh pan of rolls. On a whim, I looked around on Pinterest and found a one hour buttermilk dinner rolls recipe and decided to try it out last week. The results were promising, but a little dense and pale in our oven. I made the recipe again yesterday with a few tweaks, and we have a winner.
Ingredients
- 4 cups AP flour
- (EDIT: For wheat rolls, use 3 cups AP flour, 1 cup whole wheat flour)
- 3 tbsp sugar
- 1/2 tbsp salt
- 1 tbsp rapid rise dry yeast
- 2/3 cup buttermilk
- 4 tbsp butter
- 3/4 cup water
Method
In the bowl of a stand mixer, add all of the dry ingredients (including yeast), and stir briefly to combine. In a microwave-safe container, mix the buttermilk, butter (sliced into smaller pieces) and water. Heat until butter is melted. With the dough hook attached and mixer running, slowly add in the liquid mixture to the dry ingredients. When combined, turn speed up to medium low until dough comes together and pulls away from the sides of the bowl. If it’s too dry after a couple of minutes, add another tablespoon of buttermilk, and if it’s too wet, add some flour. It is better to err on the side of sticky. When the dough has had about 5 minutes on the mixer, remove the hook, cover the bowl and stash in a warm place for 10 minutes. This allows the dough to relax a little bit before you shape the rolls. While you’re rising the dough, preheat the oven to 170 degrees F, or as low as it will go. After your 10 minutes are up, turn the dough out onto an oiled board, and shape into rolls (I like breaking it into twelve rolls). Place rolls in a greased 9″x13″ pan, turn OFF the oven, cover the tray and allow the rolls to rise in the oven for 20-25 minutes. When the rolls have risen, remove them from the oven (VERY IMPORTANT) and preheat to 400 degrees F. Bake the rolls for 20-25 minutes, covering them loosely with aluminum foil if they start to brown too much. Remove from the oven and allow them to cool as long as you can before consuming in a frenzy of butter and crumbs.
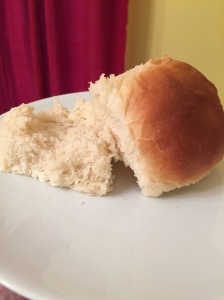
While they do take a little longer than an hour with these modifications (about 75 minutes), the results are worth it. These are light, fluffy rolls that are great with dinner, or as rolls for sandwiches. This is definitely going to be entering our bread rotation in a big way. It’s also a short enough process that I can make the dough, and let them rise and bake while we’re working on the rest of dinner, which makes these absolutely manageable as a weeknight bread option.

